Travel Trailer Heater Repair
Keeping your travel trailer warm is crucial for comfortable adventures, but heater issues can quickly dampen the fun. This comprehensive guide simplifies travel trailer heater repair, walking you through common problems, safety precautions, and step-by-step troubleshooting. Learn to identify and fix everything from pilot light failures to airflow problems, ensuring your RV stays cozy. Whether you’re a DIY enthusiast or just need to diagnose the issue before calling a pro, you’ll find valuable insights to get your furnace blowing warm air again.
There’s nothing quite like cozying up in your travel trailer after a day of adventure, especially when the temperatures drop outside. But imagine this: you flick on the thermostat, listen for the comforting hum of the furnace, and… silence. Or maybe it kicks on, but only cold air blows out. Frustrating, right? A malfunctioning heater can quickly turn a relaxing getaway into a chilly ordeal.
Don’t let a faulty furnace ruin your camping trip! Many common travel trailer heater repair issues can be diagnosed and even fixed with a bit of knowledge and some basic tools. This guide is designed to empower you, giving you the confidence to troubleshoot your RV furnace like a pro. We’ll walk you through everything from understanding how your heater works to tackling the most frequent problems you might encounter, all while keeping safety front and center.
Whether you’re a seasoned RVer or just starting your journey, knowing the ins and outs of travel trailer heater repair is an invaluable skill. So, grab your flashlight, maybe a multimeter, and let’s dive into getting that warm air flowing through your travel trailer once more. We’ll make this journey together, one simple step at a time, ensuring your comfort no matter where your wheels take you.
Key Takeaways
- Safety First: Always prioritize safety when dealing with propane and electrical systems. Turn off power and propane supply before any inspection or repair.
- Understand Your System: Familiarize yourself with your RV furnace’s basic components and how it operates (thermostat, circuit board, igniter, blower, exhaust).
- Common Issues are Often Simple Fixes: Many problems, like no heat or blower not working, stem from low propane, dirty filters, or a tripped breaker.
- Systematic Troubleshooting is Key: Follow a logical diagnostic process, starting with the easiest checks (power, propane, thermostat) before diving into more complex components.
- Propane and Electrical Interplay: RV furnaces rely on both propane for fuel and 12V DC power for control, ignition, and the blower motor. Check both sources diligently.
- Preventative Maintenance Reduces Repairs: Regular cleaning of the furnace, checking vents, and inspecting wiring can prevent many common travel trailer heater repair needs.
- Know Your Limits: While many repairs are DIY-friendly, certain issues (like circuit board replacement or gas valve problems) might require a certified RV technician.
Quick Answers to Common Questions
What’s the most common reason an RV furnace won’t turn on?
The most common reasons are often simple: a low 12V battery, an empty propane tank, or a blown fuse. Always start troubleshooting by checking these three basics before diving into more complex components.
Can a dirty filter cause my RV furnace to stop working?
Yes, a dirty or clogged air filter can severely restrict airflow, causing the furnace to overheat and trigger its limit switch, leading to short cycling or complete shutdown as a safety measure.
How do I know if my travel trailer heater is running on propane or electricity?
RV furnaces typically run on propane for heating, with 12V DC electricity powering the blower, thermostat, and ignition system. There are often also electric fireplaces or heat pumps in RVs, which are separate units.
What does it mean if my furnace blower runs but no heat comes out?
This usually indicates that the furnace isn’t igniting the propane. Potential causes include low propane, air in the gas lines, a faulty igniter, a dirty flame sensor, or a problem with the sail switch not detecting adequate airflow.
Is it safe to try travel trailer heater repair myself?
Many basic troubleshooting and repair steps are safe for DIY, especially if you prioritize safety by shutting off power and propane. However, complex gas valve issues, heat exchanger problems, or if you’re uncomfortable, should always be handled by a certified professional.
📑 Table of Contents
- Understanding Your RV Furnace: The Heart of Your Warmth
- Safety First: Essential Precautions Before Any Repair
- Common Travel Trailer Heater Problems and Solutions
- Step-by-Step Troubleshooting Guide for Travel Trailer Heater Repair
- When to Call a Professional & Preventative Maintenance
- Tools and Parts for DIY Travel Trailer Heater Repair
- Conclusion: Stay Warm, Stay Adventurous
Understanding Your RV Furnace: The Heart of Your Warmth
Before you can embark on any travel trailer heater repair, it’s really helpful to understand the basics of how your RV furnace operates. It’s a bit different from your home furnace, but the core principle is the same: burn fuel to create heat and then distribute that heat.
How an RV Furnace Works
Most travel trailers use a forced-air propane furnace. Here’s a simplified breakdown:
- Thermostat Call: You set the thermostat to your desired temperature. When the inside temperature drops below that setting, the thermostat sends a signal to the furnace’s circuit board.
- Blower Motor Engages: The circuit board tells the blower motor to start. This motor has two functions: it pushes air through the heat exchanger for warmth and pulls in combustion air.
- Ignition Sequence: Once the blower is running, the circuit board activates the igniter (often a DSI, or Direct Spark Ignition system) and opens the gas valve, allowing propane to flow.
- Combustion: The igniter sparks, igniting the propane. The flame heats a sealed chamber called the heat exchanger.
- Air Circulation: As the heat exchanger warms up, the blower motor pushes cold air from your living space over the hot heat exchanger, warming it up.
- Warm Air Distribution: The now-warm air is then pushed through ducts and out into your travel trailer. Meanwhile, combustion byproducts are safely vented outside through the exhaust vent.
- Cycle Continues: The furnace continues to operate until your travel trailer reaches the thermostat’s set temperature. Then, the gas valve closes, the igniter stops, and the blower runs for a short while longer to cool down the heat exchanger before shutting off.
Key Components to Know
Knowing these parts will make any travel trailer heater repair much easier:
- Thermostat: Your control center for temperature.
- Circuit Board: The “brain” that manages the entire sequence.
- Blower Motor: Moves air for both combustion and heating.
- Sail Switch: A safety device that ensures adequate airflow from the blower before ignition can occur.
- Limit Switch: Another safety feature that shuts off the furnace if it overheats.
- Gas Valve: Controls the flow of propane to the burner.
- Igniter/Electrode: Sparks to ignite the propane.
- Flame Sensor: Confirms that a flame has been established. If no flame is detected, it shuts off the gas to prevent unburned propane from accumulating.
- Heat Exchanger: The sealed chamber where propane burns and transfers heat to the circulating air.
- Ductwork and Vents: Distribute warm air throughout your RV.
Safety First: Essential Precautions Before Any Repair
Before you even think about starting any travel trailer heater repair, safety is absolutely paramount. You’re dealing with propane gas and electricity, both of which can be dangerous if mishandled. Please take these precautions seriously.
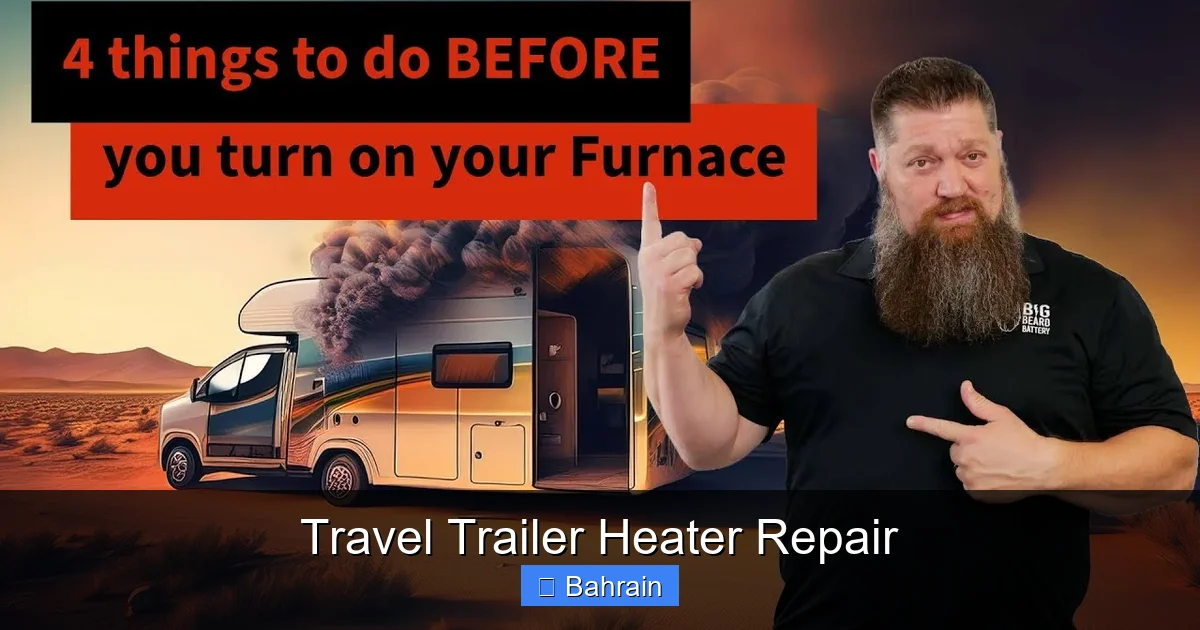
Visual guide about Travel Trailer Heater Repair
Image source: i.ytimg.com
Always Prioritize Your Well-being
- Turn Off Power: Disconnect your travel trailer from shore power and turn off your 12V battery disconnect switch. This prevents accidental electrocution and damage to sensitive electronic components.
- Shut Off Propane: Close the main valve on your propane tank(s). This is critical to prevent gas leaks, which can lead to fires or explosions.
- Ventilation: When working inside the RV or on the furnace, ensure good ventilation. Propane is heavier than air and can accumulate in low spaces.
- No Open Flames or Sparks: Never work on propane components with an open flame nearby. Avoid anything that could create a spark.
- Read Your Manual: Your travel trailer’s owner’s manual and the furnace manufacturer’s manual are invaluable resources. They contain specific safety instructions and troubleshooting steps for your exact model.
- Wear Protective Gear: Gloves and safety glasses are always a good idea when working with tools and components.
Common Travel Trailer Heater Problems and Solutions
Most travel trailer heater repair issues fall into a few common categories. Let’s look at what typically goes wrong and some initial steps you can take.
1. Furnace Won’t Start (No Blower, No Heat)
This is often the simplest to fix.
- No Power: Check your RV’s 12V battery level. An RV furnace needs 12V DC power to operate the thermostat, circuit board, and blower motor. A low battery might not provide enough power. Ensure your battery disconnect is ON.
- Blown Fuse/Tripped Breaker: Check the 12V fuses in your RV’s power center. There’s usually a specific fuse for the furnace. Replace any blown fuses.
- Thermostat Issues: Make sure the thermostat is set to “HEAT” and the temperature setting is above the ambient temperature. Check if it needs new batteries (if applicable).
- Loose Wiring: Inspect the wiring connections at the furnace and thermostat. A loose wire can prevent power from reaching the unit.
2. Blower Runs, But No Heat (or Cold Air)
This indicates that the blower motor is working, but the ignition process isn’t completing or the flame isn’t establishing.
- Low Propane: Is your propane tank full and the valve fully open? A common oversight! The furnace needs sufficient propane pressure.
- Air in Propane Lines: If you’ve just refilled your tanks or switched tanks, there might be air in the lines. Try lighting a stove burner for a minute or two to purge the air, then try the furnace again.
- Dirty/Blocked Exhaust Vent: Check the exterior exhaust vent for obstructions (mud dauber nests, leaves, etc.). A blocked vent can trigger a safety shutdown.
- Sail Switch Issues: The sail switch confirms adequate airflow before ignition. If it’s dirty, stuck, or faulty, it won’t allow the furnace to ignite. Accessing and cleaning it often requires removing the furnace cover.
- Ignition Failure: The igniter might be dirty, corroded, or incorrectly gapped. It needs to create a strong spark to ignite the propane. The flame sensor, which is usually part of the igniter assembly, also needs to be clean to detect the flame.
3. Furnace Cycles On and Off Rapidly (Short Cycling)
This means the furnace runs for a short period, then shuts off, only to restart shortly after.
- Blocked Air Return or Vents: Restricted airflow is a primary cause. Check all furnace return air grilles inside your travel trailer and ensure they aren’t blocked by furniture, pet hair, or debris. Also, make sure all warm air supply vents are open and not blocked.
- Overheating (Limit Switch Tripped): Poor airflow can cause the heat exchanger to overheat, triggering the limit switch, which is a safety mechanism. Cleaning vents and ensuring clear airflow is crucial for this type of travel trailer heater repair.
- Dirty Air Filter: Some RV furnaces have an air filter on the return air side. A dirty filter severely restricts airflow, leading to overheating. Check and clean/replace it if present.
Step-by-Step Troubleshooting Guide for Travel Trailer Heater Repair
When your heater stops working, a systematic approach to travel trailer heater repair will save you time and frustration. Follow these steps from simplest to most complex.
Step 1: The Basics – Power, Propane, and Thermostat
- Check Thermostat:
- Is it set to “HEAT”?
- Is the temperature setting above the current room temperature?
- If battery-operated, are the batteries fresh?
- Check Propane Supply:
- Are your propane tanks full?
- Is the valve on the tank(s) fully open?
- Have you recently run out of propane? Purge the lines by lighting a stove burner for a minute.
- Check Electrical Power:
- Is your RV battery fully charged? (12.6V or higher is ideal).
- Is your battery disconnect switch ON?
- Check the 12V fuses in your RV’s power center. Look for the fuse labeled “FURNACE” or “HEATER” and replace it if blown.
- If you’re plugged into shore power, ensure your converter is working to supply 12V DC power.
Step 2: Listen and Observe the Startup Sequence
Try to cycle the furnace on and listen carefully to what happens.
- Does the Blower Motor Start?
- If NO: Recheck power (fuses, battery, thermostat wiring). The issue is likely electrical before the ignition sequence.
- If YES: Proceed to the next step.
- Do You Hear Clicking (Ignition)?
- If NO: The circuit board might not be sending the signal to ignite. This could be due to a faulty sail switch (no airflow detected), limit switch, or the board itself.
- If YES: This indicates the igniter is attempting to spark.
- Does the Furnace Attempt to Light (Flame)?
- If NO, but clicking occurs: Propane might not be reaching the burner, or the igniter is sparking but not in the right place or strongly enough.
- If YES, and then shuts off: The flame sensor might not be detecting the flame, or the flame is weak and not stable.
Step 3: Inspect Components (with power and propane OFF!)
- Exterior Vent: Check the furnace exhaust vent outside your travel trailer. Clear any insect nests, dirt, or debris.
- Sail Switch:
- Locate your furnace (usually accessed from inside or outside). Remove the cover.
- The sail switch has a small ‘sail’ or paddle. Ensure it moves freely and isn’t stuck or obstructed. It needs to be clean. Gently clean it if dirty.
- Igniter/Flame Sensor:
- These are often combined. Inspect them for corrosion or carbon buildup. You can gently clean them with fine-grit sandpaper or an emery board.
- Check the gap between the igniter and the burner. Refer to your furnace manual for the correct spacing (usually around 1/8 inch).
- Wiring Connections: Visually inspect all wiring connections at the furnace’s circuit board, gas valve, igniter, and blower motor. Look for loose, corroded, or burnt wires.
- Airflow: Check all return air grilles and warm air vents inside your RV. Ensure they are clear and not blocked. If your furnace has an air filter, check and clean/replace it.
When to Call a Professional & Preventative Maintenance
While many travel trailer heater repair issues are DIY-friendly, some problems are best left to a certified RV technician. Knowing your limits is part of smart ownership.
When to Seek Professional Help
- Gas Leaks: If you suspect a propane leak (smell of rotten eggs, audible hissing), evacuate your RV immediately, turn off the propane tanks, and call a professional. Never attempt to repair gas lines yourself.
- Persistent Ignition Problems: If you’ve cleaned the igniter, checked propane, and still can’t get a reliable flame, there might be an issue with the gas valve, circuit board, or burner assembly that requires specialized tools and expertise.
- Circuit Board Failure: While you can replace a circuit board, diagnosing if it’s truly faulty can be tricky without testing equipment. Incorrect installation can also damage a new board.
- Heat Exchanger Cracks: This is a serious safety concern as it can allow carbon monoxide into your living space. Symptoms include a distinct burning smell, soot inside the furnace, or consistent CO alarm activation. This requires immediate professional attention and replacement.
- Lack of Confidence: If at any point you feel unsure or uncomfortable with a repair, it’s always safer to consult a professional. Your safety is paramount.
Preventative Maintenance to Avoid Future Repairs
A little preventative care goes a long way in avoiding unexpected travel trailer heater repair needs.
- Regular Cleaning: At least once a season (or more frequently if you travel often), clean the exterior furnace vent and inspect the interior of the furnace for dust, dirt, and insect nests.
- Check Airflow: Keep all return air grilles and supply vents clear of obstructions. If your furnace has a filter, clean or replace it regularly.
- Battery Health: Keep your RV’s 12V battery charged and in good condition. A weak battery can cause intermittent furnace issues.
- Propane System Check: Periodically check your propane tank levels and ensure the connections are secure. Consider a professional annual propane system check.
- Test Carbon Monoxide Detector: Ensure your CO detector is working correctly. It’s your first line of defense against dangerous gas leaks.
- Run Your Furnace Regularly: Even in warmer months, cycle your furnace on for 15-20 minutes once a month. This helps keep components from seizing up and clears out any dust.
Tools and Parts for DIY Travel Trailer Heater Repair
Having the right tools on hand can make all the difference when troubleshooting your furnace.
Basic Toolkit Essentials
- Screwdrivers: Phillips and flathead.
- Pliers: Needle-nose and standard.
- Adjustable Wrench: For gas line fittings (use with caution!).
- Flashlight or Headlamp: Essential for seeing into tight spaces.
- Multimeter: For checking voltage and continuity. This is a crucial tool for diagnosing electrical issues.
- Wire Brush/Emery Board: For cleaning igniters and flame sensors.
- Shop Vacuum/Compressed Air: For cleaning out dust and debris.
- Owner’s Manual/Service Manual: Your RV and furnace manuals are your best friends for specific diagrams and troubleshooting codes.
Common Replacement Parts to Consider Stocking (Optional)
Depending on your comfort level and how often you’re out, you might consider carrying:
- Spare Fuses: Specifically for your furnace’s amperage.
- Thermostat Batteries: If your thermostat uses them.
- Sail Switch: A common failure point.
- Igniter/Flame Sensor Assembly: Another relatively common part that can fail.
Having these items on hand means you can often complete a travel trailer heater repair on the spot, avoiding delays and discomfort.
Conclusion: Stay Warm, Stay Adventurous
Dealing with a broken travel trailer heater can definitely be a nuisance, but as you’ve seen, many common problems have straightforward solutions. By understanding how your RV furnace works, practicing basic safety, and following a systematic troubleshooting process, you can often perform your own travel trailer heater repair and get that warm air flowing again.
Remember, prevention is always better than cure. Regular maintenance and attentive checks will significantly reduce the chances of encountering a cold trailer. So, next time your furnace acts up, take a deep breath, consult this guide, and confidently tackle the repair. Here’s to many more warm, cozy, and comfortable adventures in your travel trailer!
Frequently Asked Questions
How often should I clean my RV furnace?
It’s a good practice to clean your RV furnace at least once a season, or more frequently if you travel extensively or in dusty environments. This includes clearing exterior vents and vacuuming out the interior components and return air grilles to prevent debris buildup.
Why does my carbon monoxide detector keep going off when the furnace runs?
If your CO detector repeatedly goes off while the furnace is operating, it could indicate a serious issue like a cracked heat exchanger allowing combustion gases into your living space. Turn off the furnace, ventilate your RV, and seek professional inspection immediately; do not use the furnace until it’s deemed safe.
Can low battery voltage affect my travel trailer heater’s performance?
Absolutely. RV furnaces require sufficient 12V DC power to operate the blower motor, circuit board, and ignition system. Low battery voltage (below 12.0V) can prevent the furnace from starting, cause it to cycle improperly, or fail to ignite reliably.
What is the “sail switch” and what does it do?
The sail switch is a critical safety device within your RV furnace. It’s a small switch with a “sail” or paddle that must be pushed open by adequate airflow from the blower fan before the furnace will allow ignition. If it’s dirty, stuck, or faulty, the furnace won’t light for safety reasons.
My furnace makes a loud banging noise when it starts. What could it be?
A loud banging or “thump” at startup often indicates a delayed ignition, where propane accumulates slightly before finally igniting. This can be caused by a dirty igniter, low gas pressure, or problems with the gas valve. It should be addressed promptly as it can be hard on the system.
Should I leave my RV furnace running when I’m away from the travel trailer?
It is generally safe to leave your RV furnace running when you’re away, especially in cold weather, to prevent pipes from freezing and maintain internal temperatures. However, always ensure your propane and carbon monoxide detectors are operational and that you have sufficient propane supply.