Travel Trailer Ac Repair
Keep your travel trailer cool and comfortable with essential knowledge about travel trailer AC repair. This comprehensive guide helps you understand common AC issues, perform basic troubleshooting steps, and decide when professional help is needed. Learn practical tips and preventative maintenance to ensure your RV’s air conditioning system runs smoothly, making your travels enjoyable.
Travel Trailer Ac Repair
Imagine this: you’ve packed up your travel trailer, the open road calls, and you’re dreaming of cool evenings under the stars. But then, a scorching day hits, and your trusty air conditioner decides to take an unscheduled break. Suddenly, your serene getaway turns into a sweaty nightmare. For any travel trailer owner, a functioning AC unit isn’t just a luxury; it’s an absolute necessity, especially when you’re exploring warmer climates or facing the summer heat.
The good news is that many common travel trailer AC problems aren’t as daunting as they first appear. With a bit of knowledge, some basic tools, and a willingness to get hands-on, you can often diagnose and even fix minor issues yourself. This not only saves you time and money but also gives you a fantastic sense of accomplishment. This comprehensive guide is here to walk you through everything you need to know about travel trailer AC repair, from understanding how your system works to performing basic troubleshooting and knowing when it’s time to call in the experts.
So, if you’re ready to tackle your travel trailer AC repair head-on, or simply want to be better prepared for future trips, you’ve come to the right place. We’ll break down the complexities into easy-to-understand steps, using simple language and practical tips. Let’s make sure your travel trailer remains a cool and comfortable oasis, no matter where your adventures take you. Getting your travel trailer AC repair done right means more enjoyable journeys ahead!
Key Takeaways
- Understand Your AC: Knowing how your travel trailer AC works and its basic components helps in effective troubleshooting and repair.
- Identify Common Problems: Familiarize yourself with typical AC issues like no power, weak cooling, strange noises, and water leaks, along with their usual symptoms.
- Master Basic Troubleshooting: Many AC problems can be solved with simple steps like checking power, cleaning filters, and inspecting for obstructions before calling a professional.
- Know When to Call a Pro: While many minor fixes are DIY-friendly, complex issues involving refrigerant, compressor, or advanced electrical systems are best left to certified technicians for safety and effectiveness.
- Prioritize Safety: Always disconnect power before attempting any repair. Wear appropriate safety gear to prevent accidents, especially when working with electrical components or at heights.
- Perform Regular Maintenance: Consistent cleaning of filters and coils, along with annual check-ups, is crucial for preventing major travel trailer AC repair issues and extending the unit’s lifespan.
Quick Answers to Common Questions
Question 1?
Why isn’t my travel trailer AC blowing cold air?
Answer 1?
Common reasons include a dirty air filter, clogged condenser or evaporator coils, low refrigerant levels due to a leak, a faulty thermostat, or a frozen evaporator coil. Start by checking and cleaning your filters and coils.
Question 2?
How often should I clean my travel trailer AC filter?
Answer 2?
You should clean your travel trailer AC air filter at least once a month during heavy use, or before each major trip. If you travel in dusty environments, clean it more frequently.
Question 3?
Is it safe to repair travel trailer AC myself?
Answer 3?
Many basic travel trailer AC repair tasks, like cleaning filters and coils, resetting breakers, and clearing drain lines, are safe for DIYers. However, complex issues involving refrigerant or major electrical components should be handled by a professional for safety reasons.
Question 4?
What’s the most common AC problem in travel trailers?
Answer 4?
One of the most common travel trailer AC problems is reduced cooling performance due to dirty air filters and coils. These restrict airflow and heat exchange, making the unit less efficient.
Question 5?
Can low voltage affect my travel trailer AC?
Answer 5?
Yes, low voltage can significantly impact your travel trailer AC. It can cause the compressor to struggle or not start at all, leading to poor cooling or even damage to the unit over time. Always ensure your RV receives adequate voltage.
📑 Table of Contents
- Understanding Your Travel Trailer AC System
- Common Travel Trailer AC Problems and Their Symptoms
- Basic Troubleshooting Steps for Your Travel Trailer AC
- When to DIY vs. When to Call a Professional for Travel Trailer AC Repair
- Essential Tools and Safety Tips for AC Repair
- Preventative Maintenance to Avoid Future AC Headaches
- Conclusion
Understanding Your Travel Trailer AC System
Before you can fix something, it helps to understand how it works. Your travel trailer AC system, while compact, operates on the same basic principles as the AC in your home or car. Knowing these basics will make any travel trailer AC repair much easier to grasp.
How a Travel Trailer AC Works
At its heart, an AC unit moves heat from inside your travel trailer to the outside. It doesn’t actually “make” cold air; it removes heat. Here’s a simplified breakdown of the main components and their roles:
- Compressor: This is the pump. It compresses the refrigerant gas, raising its temperature and pressure.
- Condenser: The hot, high-pressure refrigerant then flows through the condenser coil (usually located on the roof-mounted unit). Fans blow outside air over this coil, cooling the refrigerant and causing it to condense into a liquid. The heat is released outside.
- Expansion Valve (or Orifice Tube): The now cooler, liquid refrigerant passes through this valve, which drops its pressure and temperature significantly.
- Evaporator: The cold, low-pressure liquid refrigerant enters the evaporator coil (inside your travel trailer). As warm air from inside your RV is blown over this coil, the refrigerant absorbs the heat, turning back into a gas. This chilled air is then circulated into your living space.
- Fan: Essential for moving air across both the condenser and evaporator coils.
This cycle repeats, continuously removing heat from your travel trailer and keeping you cool. Any interruption in this cycle can lead to issues that require travel trailer AC repair.
Types of Travel Trailer AC Units
Most travel trailers use one of two main types of AC units:
- Roof-Mounted Units: These are the most common. They are self-contained units installed on the roof of your travel trailer. They draw in warm air from the interior, cool it, and then blow it back through ceiling vents. They are convenient because they save interior space, but they can be a bit noisy and may raise your travel trailer’s profile.
- Mini-Split Units: Less common in smaller travel trailers but gaining popularity in larger RVs, these systems have an outdoor compressor/condenser unit and an indoor air handler. They are generally quieter and more energy-efficient but require more complex installation.
No matter the type, understanding its specific layout will be key when you’re troubleshooting any travel trailer AC repair.
Common Travel Trailer AC Problems and Their Symptoms
Knowing what typical problems look like can help you quickly pinpoint the issue when your AC isn’t performing as expected. Early detection can often lead to simpler travel trailer AC repair.
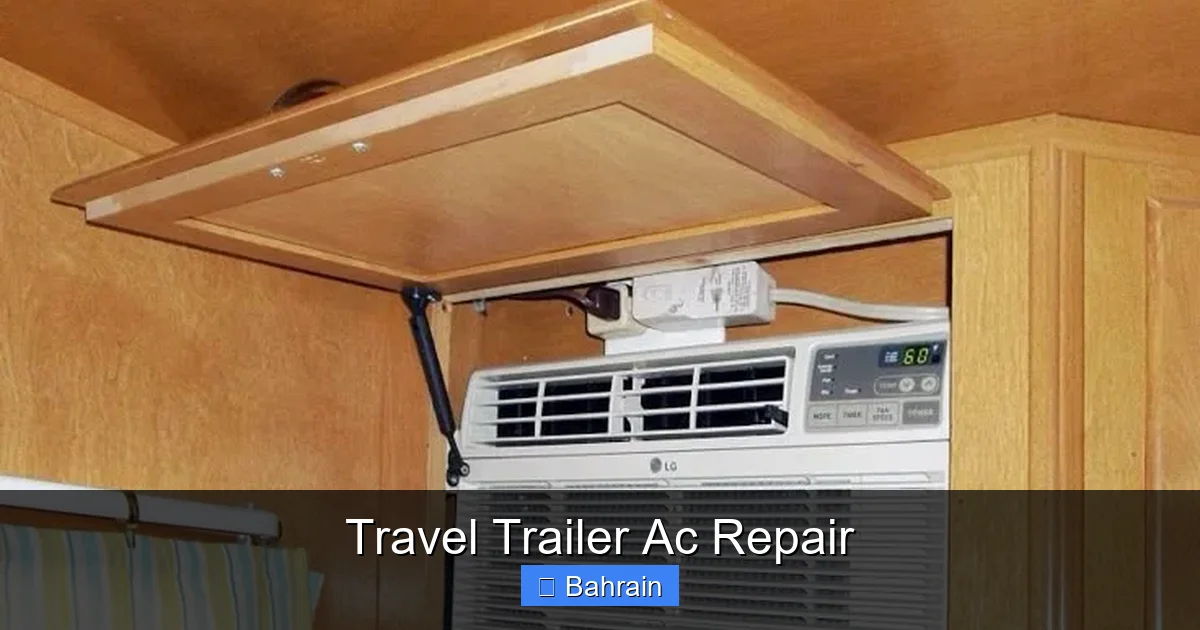
Visual guide about Travel Trailer Ac Repair
Image source: i.pinimg.com
No Power to the Unit
This is perhaps the most obvious symptom. If your AC unit is completely silent and unresponsive, it’s a sign of a power issue.
- Symptoms: The unit won’t turn on at all. No lights, no fan, no cooling.
- Causes:
- Tripped Breaker: Your travel trailer’s circuit breaker (or the shore power pedestal’s breaker) might have tripped.
- Shore Power Issue: The campground power might be weak or out.
- Faulty Wiring: Loose or damaged wiring within the unit or the travel trailer.
- Bad Capacitor: A common failure point that prevents the motor from starting.
AC Not Cooling Effectively
The unit turns on, the fan blows, but the air isn’t cold enough, or it’s blowing warm air.
- Symptoms: Warm or lukewarm air coming from the vents, the unit runs constantly but doesn’t cool the interior, weak airflow.
- Causes:
- Low Refrigerant (Leak): If the refrigerant level is too low due to a leak, the system cannot effectively transfer heat. This is a complex travel trailer AC repair.
- Dirty Coils: Both the condenser and evaporator coils can get clogged with dirt, dust, and debris, hindering heat exchange.
- Blocked Vents/Ducts: Obstructions prevent cool air from reaching the interior.
- Faulty Thermostat: The thermostat might not be reading the temperature correctly or sending the right signals.
- Icing Up: The evaporator coil might be frozen solid, blocking airflow.
AC Making Strange Noises
Your AC unit usually has a consistent hum. Any new or unusual sounds are a red flag.
- Symptoms: Grinding, squealing, rattling, buzzing, clicking.
- Causes:
- Loose Fan Blades: Blades can become unbalanced or hit the housing.
- Motor Issues: Worn bearings in the fan or compressor motor.
- Debris: Leaves, twigs, or other foreign objects might be stuck in the fan or coils.
- Compressor Problems: A loud grinding or banging sound could indicate a failing compressor, a major travel trailer AC repair.
Water Leaks from the Unit
Seeing water dripping inside your travel trailer from the AC unit is definitely cause for concern.
- Symptoms: Water dripping from the ceiling or running down the interior walls, puddles on the floor.
- Causes:
- Clogged Drain Tube: The condensate drain tube can become blocked with algae or debris, causing water to back up and overflow.
- Improper Installation/Seal: If the unit isn’t properly sealed to the roof, rainwater can leak in.
- Frozen Evaporator Coil: When the coil freezes, water drips as it melts, potentially overflowing the drain pan.
Basic Troubleshooting Steps for Your Travel Trailer AC
Many travel trailer AC repair issues can be solved with some simple troubleshooting. Always start with the easiest and most obvious checks first.
Check Power Connections and Breakers
This is always the first step for a “no power” issue or if the AC suddenly stops working.
- Test the Outlet: Plug another appliance into the shore power outlet to ensure it’s working.
- Reset Breakers: Go to your travel trailer’s electrical panel and flip the AC breaker (usually labeled “AC” or “Air Conditioner”) off, then firmly back on. Also, check the breaker at the campground pedestal.
- Check for Low Voltage: If your voltage is too low (below 108V), your AC might not start or could be damaged. Use a multimeter at the outlet.
Inspect Air Filters and Coils
Dirt and debris are enemies of AC efficiency.
- Clean/Replace Air Filters: Most travel trailer AC units have a removable, washable filter (often located behind the return air grille inside the RV). Clean it regularly with soap and water, or replace it if it’s disposable and heavily soiled. A clogged filter severely restricts airflow, making your AC work harder and cool less. This is a simple but crucial travel trailer AC repair step.
- Clean Condenser and Evaporator Coils:
- Condenser Coils (on the roof): With the power off, remove the top cover of your roof unit. Gently brush away leaves, dirt, and debris from the finned coils. You can also use a coil cleaner spray for deeper cleaning.
- Evaporator Coils (inside): These are usually behind the air filter. They can also get dirty. Use a soft brush and coil cleaner specifically designed for evaporator coils.
Verify Thermostat Settings
It sounds simple, but a misset thermostat can cause a lot of head-scratching.
- Check Batteries: If your thermostat is battery-powered, replace the batteries.
- Correct Mode: Ensure it’s set to “Cool” mode and the fan is on “Auto” or “High,” not just “Fan Only.”
- Temperature Setting: Make sure the desired temperature is set lower than the current ambient temperature.
Look for Obstructions
Physical blockages can impair performance.
- Vents: Ensure all interior vents are open and not blocked by furniture or curtains.
- Fan Blades: With the power off, check the outdoor fan blades for any leaves, twigs, or debris that might be impeding their rotation.
- Drain Tubes: Locate the condensate drain tube (often exiting through the roof or underneath the unit) and check for clogs. You can sometimes clear it with compressed air or a thin wire.
Listen for Unusual Sounds
Pay attention to where the noise is coming from.
- Rattling: Could be loose screws or debris in the fan. Tighten screws or remove debris.
- Squealing: Often indicates a failing motor bearing or a loose belt (less common in modern RV ACs).
- Grinding: Could be a serious motor or compressor issue, indicating a more complex travel trailer AC repair.
When to DIY vs. When to Call a Professional for Travel Trailer AC Repair
Knowing your limits is just as important as knowing how to fix things. Some travel trailer AC repair tasks are safe and straightforward for DIYers, while others require specialized tools, knowledge, and safety precautions best left to certified technicians.
DIY-Friendly Repairs
These are the tasks most travel trailer owners can handle with a little confidence and basic tools:
- Filter Cleaning and Replacement: Absolutely a DIY task. Do it often!
- Resetting Breakers: Simple and common fix for no power.
- Cleaning Coils: With power disconnected, cleaning the condenser and evaporator coils is generally safe.
- Clearing Drain Lines: Using compressed air or a thin brush to clear blockages.
- Checking Thermostat Batteries/Settings: An easy check that often resolves issues.
- Removing Minor Obstructions: Clearing leaves or debris from the fan blades (after disconnecting power).
These preventative and minor travel trailer AC repair tasks can save you significant money and keep your system running smoothly.
When to Seek Expert Help
For more complex or dangerous issues, it’s always best to call a qualified RV AC technician. They have the training, tools, and experience to handle these jobs safely and effectively.
- Refrigerant Leaks or Recharge: Refrigerant is a regulated substance. It requires specific tools (manifold gauges, vacuum pump) and expertise to diagnose leaks, repair them, and correctly recharge the system. Releasing refrigerant into the atmosphere is illegal and harmful. This is definitely a job for a professional travel trailer AC repair specialist.
- Compressor Issues: If your compressor is failing (indicated by grinding noises, constant tripping, or no start despite power), it’s a major component replacement that requires specialized skills.
- Electrical Faults Beyond Simple Checks: If you’ve checked breakers and connections but still have no power, or suspect faulty wiring inside the unit, it’s time for a professional. Electrical work can be dangerous.
- Control Board Replacement: The main circuit board can fail, leading to erratic operation. Diagnosing and replacing these requires specific knowledge and sometimes programming.
- Persistent Problems: If you’ve tried all the basic troubleshooting steps and your AC is still not working correctly, it indicates a deeper issue. Don’t keep guessing; get professional help.
- Under Warranty: If your travel trailer or AC unit is still under warranty, attempting complex DIY repairs could void it. Always check your warranty terms first.
Essential Tools and Safety Tips for AC Repair
Having the right tools and prioritizing safety are crucial for any travel trailer AC repair project.
Must-Have Tools
Here’s a basic toolkit for common AC troubleshooting and minor repairs:
- Screwdrivers (Phillips and Flathead): For removing access panels and covers.
- Adjustable Wrench: For loosening and tightening nuts and bolts.
- Multimeter: Essential for testing voltage, amperage, and continuity in electrical components. This can help diagnose power issues or faulty parts.
- Cleaning Brushes/Coil Cleaner: For keeping your coils spotless.
- Shop Vacuum/Compressed Air: For clearing debris and drain lines.
- Flashlight: To illuminate dark areas within the unit.
- Gloves: For protecting your hands.
- Safety Goggles: Especially important when cleaning or dealing with potential flying debris.
- Ladder: For safe access to roof-mounted units.
Prioritizing Safety
Safety should be your number one concern when performing any travel trailer AC repair. Electricity and heights can be dangerous.
- ALWAYS Disconnect Power: Before touching any electrical components or working inside the unit, switch off the AC unit at the thermostat, then turn off the main circuit breaker for the AC at your travel trailer’s electrical panel. If connected to shore power, unplug the RV. Use your multimeter to verify that there’s no power.
- Wear Protective Gear: Gloves and safety goggles are a must to protect against sharp edges, dust, and debris.
- Be Cautious with Heights: If working on a roof-mounted unit, use a sturdy ladder and have someone spot you if possible. Be aware of your balance and don’t overreach.
- Never Release Refrigerant: As mentioned, refrigerant is harmful to the environment and illegal to release. If you suspect a leak, call a professional.
- Don’t Work in Inclement Weather: Avoid working on electrical components in rain or high humidity.
- Follow Manufacturer’s Instructions: Always consult your specific AC unit’s owner’s manual for model-specific repair and maintenance instructions.
Preventative Maintenance to Avoid Future AC Headaches
The best travel trailer AC repair is the one you never have to do! Regular preventative maintenance can significantly extend the life of your unit and prevent most common breakdowns.
Regular Cleaning Schedule
This is the simplest and most effective maintenance you can do.
- Clean Air Filters: At least once a month during heavy use, or before each major trip. More often if you travel in dusty areas.
- Clean Coils: Clean the condenser coils on the roof annually or bi-annually. Clean the evaporator coils inside annually. Use a gentle brush and approved coil cleaner.
- Clear Drain Lines: Check and clear the condensate drain lines annually, or whenever you notice slow drainage or pooling water.
Annual Professional Inspection
Even if you’re handy, an annual check-up by a qualified RV technician can catch potential issues before they become major travel trailer AC repair problems.
- They can check refrigerant levels, inspect electrical connections, test components, and ensure overall system health.
- This is especially important before the hot summer season begins.
Checking Seals and Vents
Ensuring your travel trailer is well-sealed helps your AC work more efficiently.
- Check Roof Seals: Inspect the seal around your roof-mounted AC unit for cracks or gaps. Reseal with appropriate RV sealant if necessary to prevent water leaks.
- Inspect Ductwork and Vents: Make sure interior ductwork isn’t kinked or blocked, and that all vents are clear and functioning.
Running the AC Periodically
If your travel trailer sits for long periods, it’s a good idea to run the AC for 15-20 minutes once a month, even in cooler weather.
- This helps keep seals lubricated and prevents components from seizing up.
- It also helps circulate refrigerant and keeps the system ready for use.
By following these preventative steps, you’ll greatly reduce the likelihood of needing emergency travel trailer AC repair and ensure your unit is always ready to keep you cool and comfortable.
Conclusion
Navigating the world of travel trailer AC repair can seem intimidating at first, but with the right guidance, it’s a skill every RV owner can develop. From understanding the core principles of how your AC works to diagnosing common ailments and applying simple fixes, you’re now equipped with the knowledge to maintain your cool, no matter what the road throws at you. Remember, many issues can be resolved with basic troubleshooting and regular maintenance, saving you precious time and money on your adventures.
While empowering yourself with DIY repair knowledge is invaluable, it’s equally important to recognize when a problem extends beyond your skill set or comfort zone. Don’t hesitate to call a certified professional for complex issues involving refrigerant, major electrical faults, or compressor problems. Prioritizing safety and knowing your limits ensures that your travel trailer AC repair is done correctly and without risk.
Ultimately, a well-functioning air conditioner is key to enjoying your travel trailer to the fullest, transforming it into a comfortable sanctuary in any climate. By taking proactive steps in maintenance and being prepared for minor repairs, you can ensure your journeys are always filled with cool breezes and pleasant memories. So, go forth, explore, and stay wonderfully chilled on all your travels!
🎥 Related Video: Fixed: Dometic RV AC not blowing cold air – try before replacing air conditioner – easy $15 fix
📺 RV Time
You can find part & tools used in this video here: Multimeter tool: …
Frequently Asked Questions
What kind of refrigerant does a travel trailer AC use?
Most modern travel trailer AC units use R-410A refrigerant. Older units might use R-22, which is being phased out. Always check your unit’s specifications, as using the wrong type can damage the system.
How much does professional travel trailer AC repair cost?
The cost of professional travel trailer AC repair varies widely based on the issue and parts needed. Simple diagnostics might be around $100-$200, while a refrigerant leak repair, compressor replacement, or a new control board can range from $500 to over $1500, not including the labor costs.
Can I run my AC on a generator?
Yes, most travel trailer AC units can be run on a generator, provided the generator has sufficient wattage. A typical 13,500 BTU AC unit requires about 2000-3000 watts to start up and then runs on less. Check your AC’s power requirements and your generator’s output.
Why does my AC freeze up?
An AC unit typically freezes up due to restricted airflow (e.g., dirty filter, blocked vents) or low refrigerant levels. When airflow is poor or refrigerant is low, the evaporator coil gets too cold, causing moisture in the air to freeze on it. This impedes cooling and can lead to water leaks.
How can I improve my travel trailer AC’s efficiency?
To improve efficiency, regularly clean or replace air filters, keep condenser and evaporator coils clean, ensure all interior vents are open, seal any air leaks in your RV, and try to park in the shade. Running the AC on high fan speed can also help circulate air better.
What’s the lifespan of a travel trailer AC unit?
With proper maintenance, a travel trailer AC unit typically lasts anywhere from 7 to 10 years. Factors like frequency of use, climate, and consistent maintenance play a big role in determining its overall lifespan.